Hi all,
I have been playing around a lot w/ electronics, in particular the Arduino. For those that don't know, Arduino is basically an open-source microcontroller (coded in C) that can be used for reading sensors and controlling electronic devices as a result. In this particular post, I decided to do a food-related project called "Sous Vide" that consists of a constant temperature water bath that you can cook various meats in to a perfect, uniform temperature that makes them taste amazing. While there are many commercial products on the market (Amazon affiliate link: Anova Culinary PCB-120US-K1 Bluetooth Precision Cooker, 800 Watts, Black ), I wanted to make my own as a fun project.
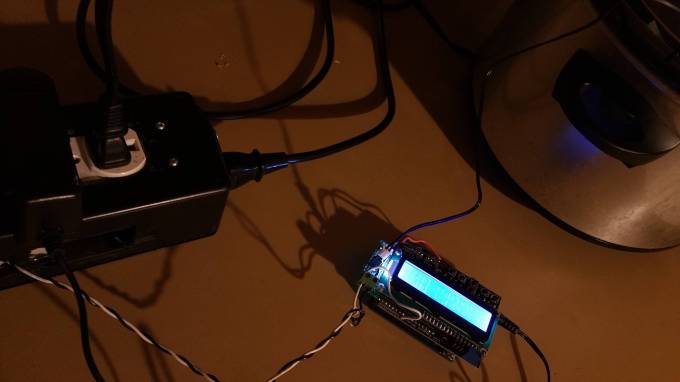
I started by putting together a power box. This consisted of a solid state relay, a wall outlet (GFCI is probably best), a fused/switched power input line, a project enclosure box, and an external power source (wall voltage, 120V). The relay was triggered on/off by a 5V signal from the Arduino. I used an Arduino with a buttoned LCD display, and a thermistor temperature sensor. Using these, I was able to build a setup that I could set the temperature I wanted to run at, plug in my crock pot, and control using my power box. (Feel free to purchase components through my Amazon affiliate links)
Unfortunately, the crock pot heated very slowly, taking 1.5 hours to get to temperature. I decided to augment the system using a standard coffee pot heater. Here is a picture of the setup:
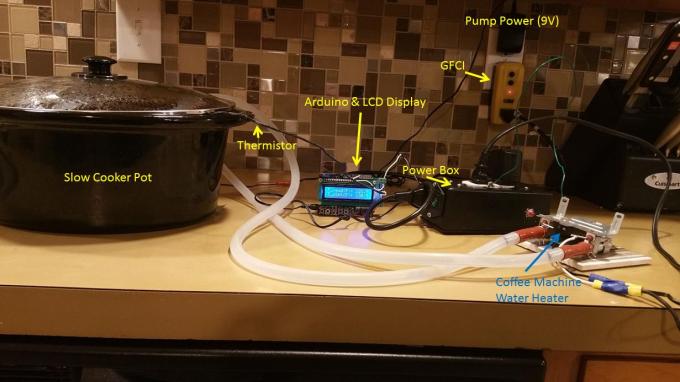 Here, I used a wall powered GFCI outlet (for safety), with the powerbox/arduino setup, a slow cooker pot, water pump, and a coffee machine water heater.
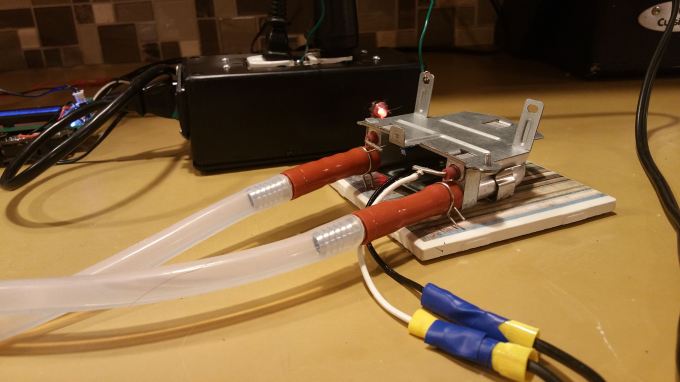
The coffee pot heater that I salvaged from an old hot water heater, I used in conjunction with some food safe, high temperature compatible tubing (I had to buy the 1/2" to 1/4" adapter hose barbed pieces on E-bay). The heater took 120V AC power directly, which I hooked up directly through the solid state relay in the power box.
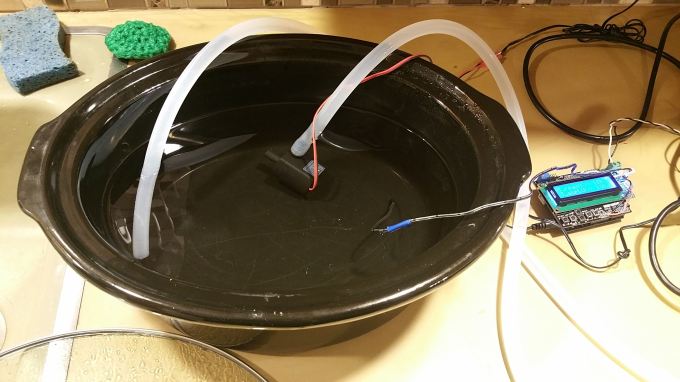
I purchased a 9V submersible pump that could handle up to 180°F from E-bay, and pumped water through the coffee pot heater at a rate of ~400 mL/min. After hooking up the thermistor and Arudino to complete the control loop. I was able to maintain reasonable control of the temperature. In order to implement my chemical engineering controls knowledge, I built a PID temperature controller that viewed each of the integral, derivative, and proportional controls in Python (wxpython, matplotlib; used Arduino serial communication to send data to laptop):
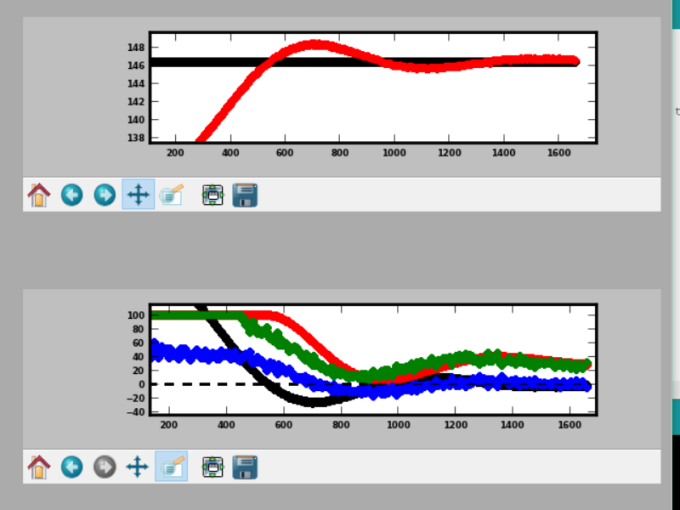
The first graph: Black is the set point, and red is the temperature (see that it overshoots by ~1.5 degreesF at first, then dampens out). The second graph shows the controller parameters: black is the p (proportional), red is the integral (builds up over time the longer that the system is away from the setpoint), blue is the derivative (accounts for how quickly the temperature is changing), and green is the overall %on (the sum of the others, except for the derivative which is subtracted).
The finished product after I had set the crock pot at 135°F (medium rare temp) for about an hour w/ a nice Ribeye:
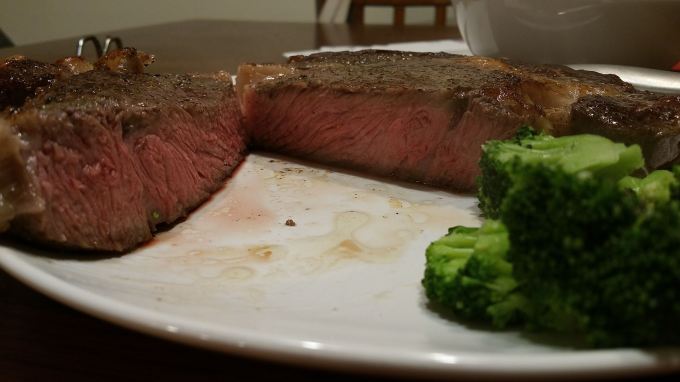
After a quick sear (a minute or so) on each side (cast-iron pan with a little bit of oil, quite hot), the steak looked amazing (and tasted the same). The texture was uniform all the way through, and was extremely juicy!
Overall a fun project, let me know if you've got any questions!
Zach
No comments:
Post a Comment